Flat Apple Tart
November 5, 2020


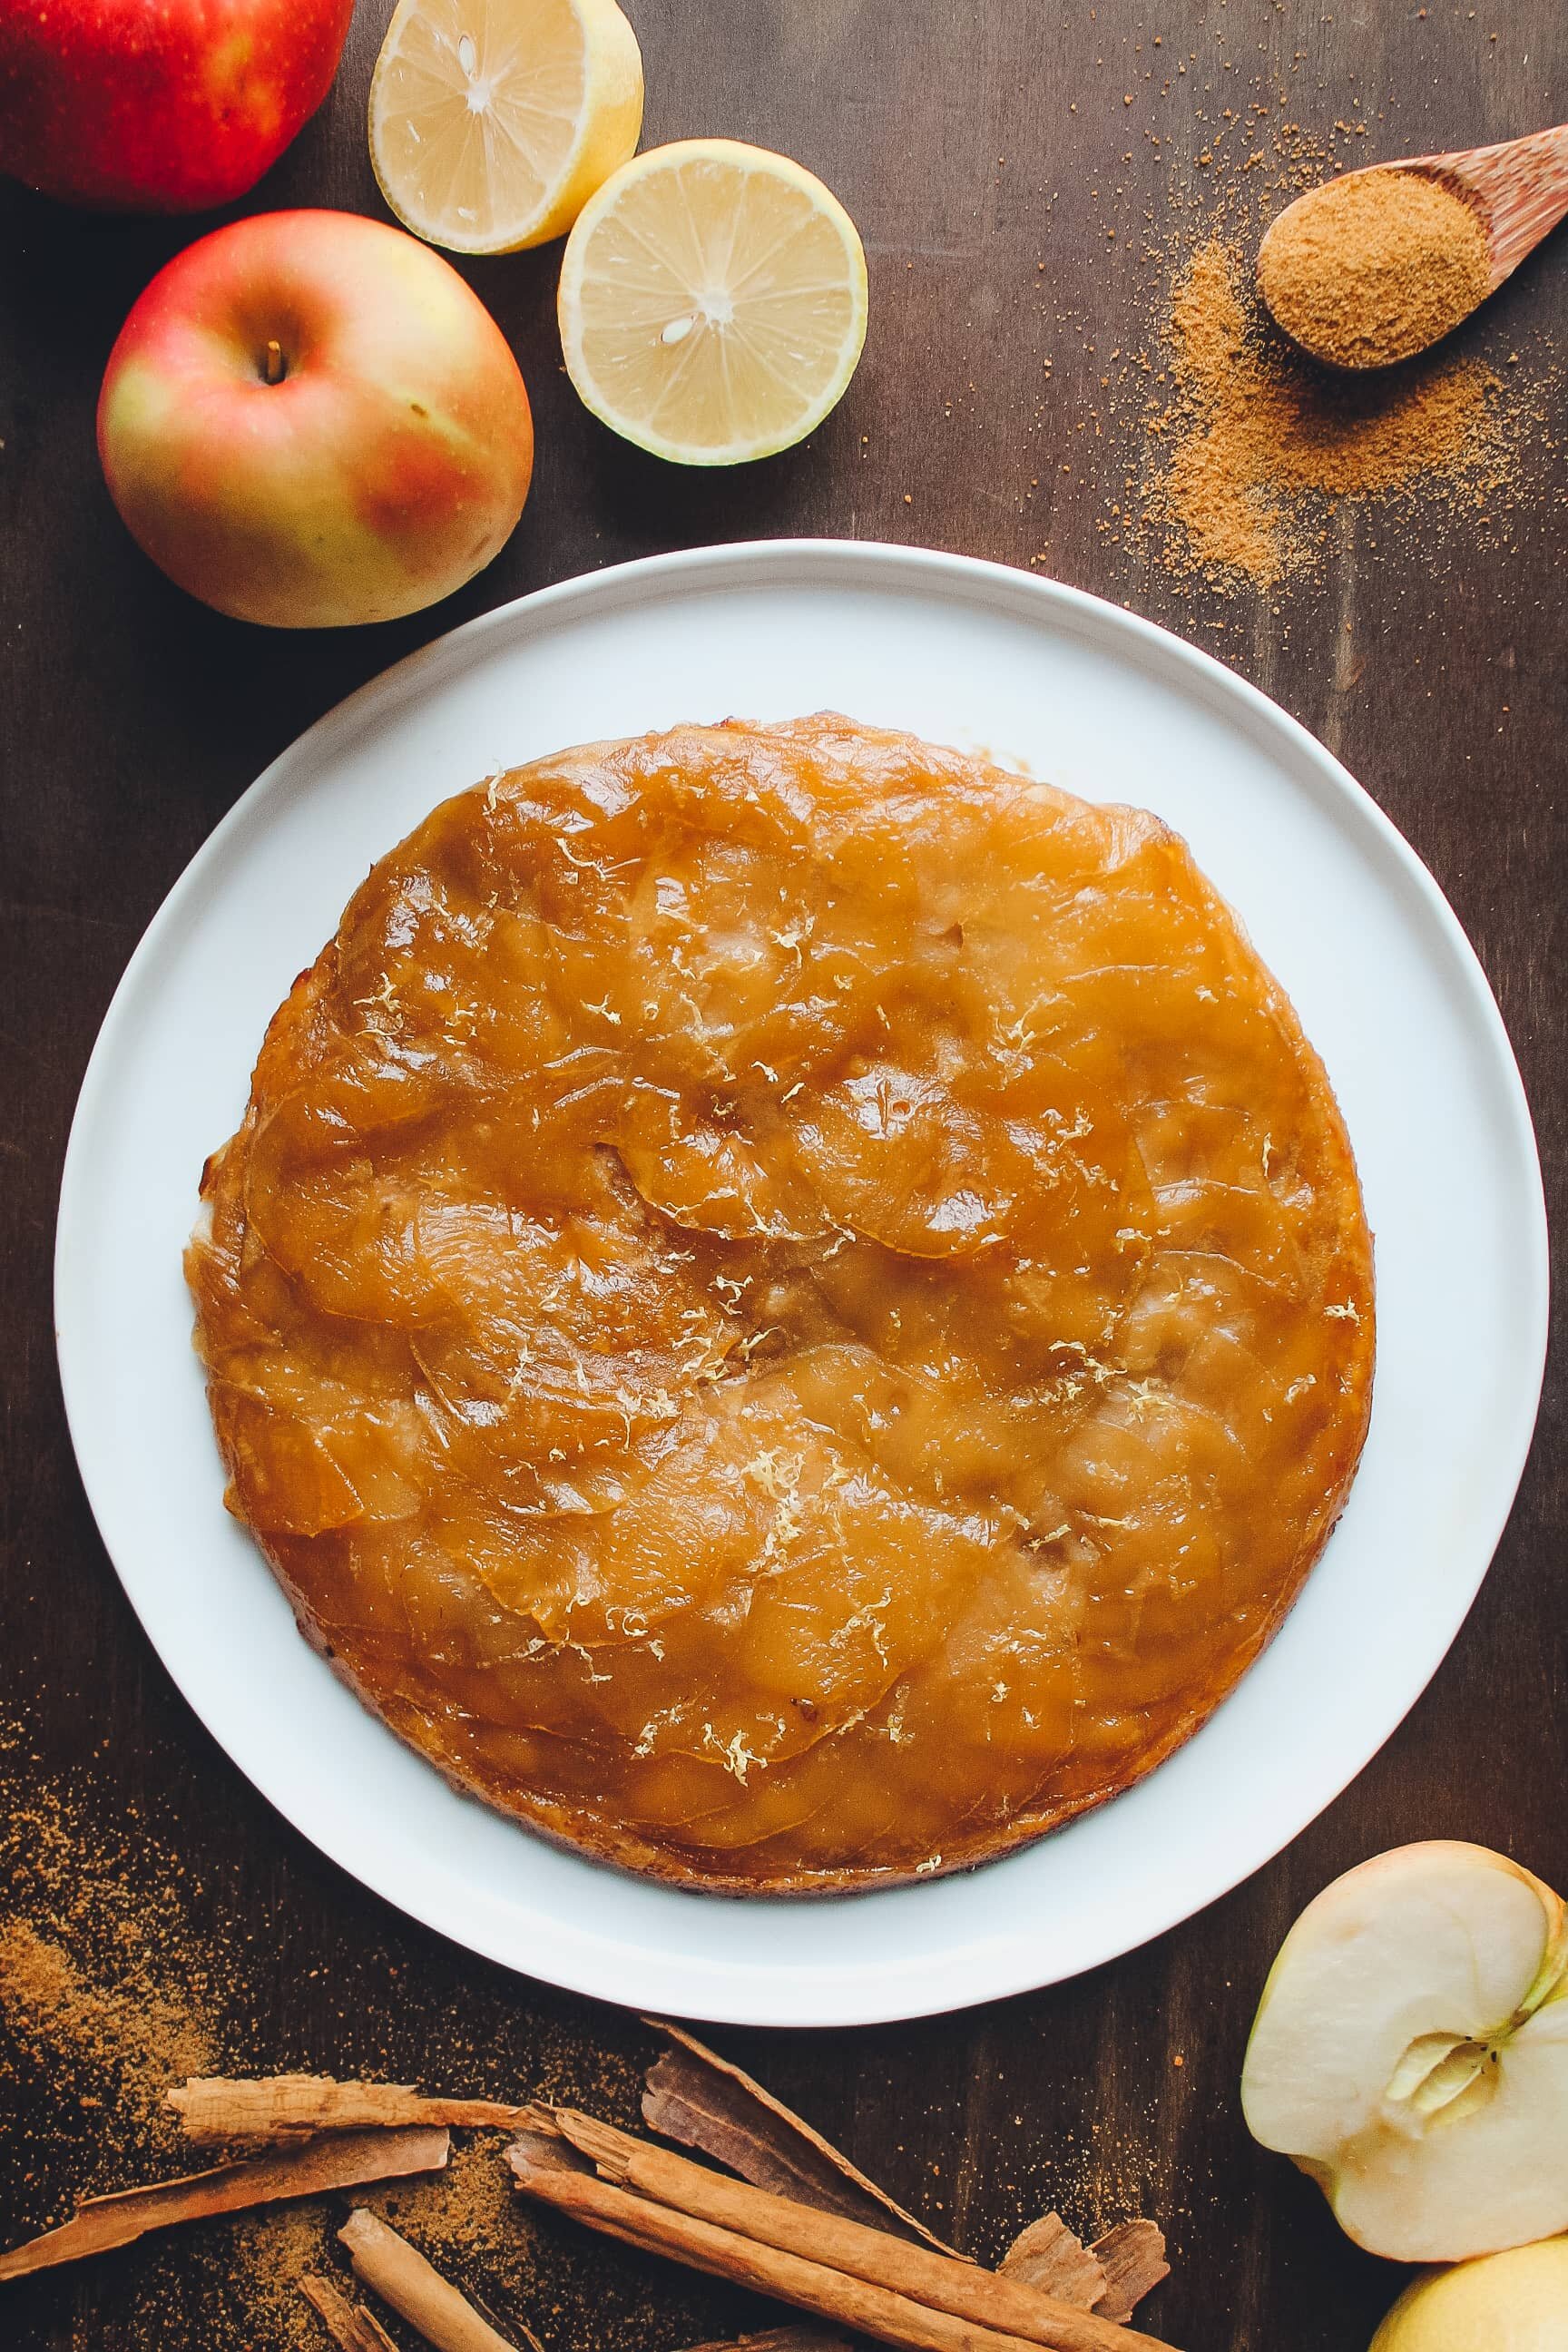
This gorgeous tart is something a little different from apple tarts you’ve seen before, but that’s the beauty of it! It’s got a super crispy, thin crust, and the apples are also sliced thinly and layered on top. With the juicy, sweet apples that are available now this tart is just SO delicious and looks like a piece of art!
It’s got a crispy bottom and delicate, buttery layers of apple on top that melt in your mouth. The maple caramel gives it sweetness, but it’s not overly sweet since there’s no extra sugar added. This makes the delicious flavor of the seasonal apples come through. Finally, it’s topped with lemon zest which gives it a bright touch and freshens the whole thing up. Citrus always goes well with apples, and it almost tricks the brain into thinking it’s acid because of the aroma, but when you eat it it’s deliciously sweet!
This tart also makes a great addition to your Thanksgiving table, so if you want to make something that really “wow”s your friends and family (and that’s vegan!) you have to try this out.
Scroll down for the recipe and video ↓
WHY FLAT?
We wanted to make a flat apple tart for a change because we were inspired by a French flat apple tart that we came across in a cookbook and we loved the idea of a crisp base and a fully exposed “filling” that could show off a beautiful design. The closest thing this tart resembles is an apple Tarte Tatin, but instead of using whole apples, we’re slicing them.
We didn’t want to make a traditional apple tart that had crust going up the sides and apples that were cut in large chunks. Instead, we decided to slice the apples super thinly so that they can dry out faster (and not be so watery) and their flavor can be concentrated. The result is a gorgeous apple “rose” decoration that really gives it that wow-factor.
NATURALLY SWEETENED
This tart is not super overpowered by spices or sugar in the way that most American apple tarts are. We really wanted to make the most of the apples that are in season now and have them be the star of the dessert. Because it doesn’t make a lot of sense to buy organic apples from the farmer’s market if you’re going to inundate it with a mix of strong spices and a sickly amount of sugar. You want it to taste like apple—it is an apple tart, after all! So this tart only has a touch of cinnamon in the crust the only sugar that goes into the filling is the maple caramel. The only other sweetener is a little bit of coconut sugar in the crust, but it’s a small amount. This makes the tart incredibly delicious because it doesn’t taste like sugar —it’s the taste of apple that really comes through.
In fact, we use 2 apples in this recipe: 1 Granny Smith and 1 Fuji (or other sweet apple) so that there’s a nice contrast and therefore balance between the tartness of the Granny Smith and the sweetness of the Fuji.


What to do with leftover crust dough
This recipe makes 1 large 10” tart or 2 smaller 8” tarts. Whatever you decided to do, you might end up with a little extra dough. But don’t throw it away! Repurpose it and make cookies; simply roll it out to your desired thickness, cut with whatever cookie shape you want, and place on a lined baking sheet.
Or if you prefer, you can use your leftover dough to make the crust for a mini tart. An individual apple tart would be fantastic as a treat for yourself the next day!

Watch the recipe video here:
Vegan Flat Apple Tart
Makes 2 X 8” tarts or 1 X 10” tart with extra crust leftover
CRUST
2 1/4 cups | 300g all-purpose flour
3/4 cup + 1 tbsp | 75g almond flour
1/4 cup| 30g coconut sugar
2 1/4 tsp | g ground cinnamon
Pinch sea salt
1/2 cup + 1 tbsp | 100ml coconut oil
1/2 cup | 90ml water
FILLING
70ml maple syrup (DIVIDED if making 2 tarts)
1 Granny Smith apple
1 Fuji or other sweet apple
TOPPING
1 tbsp maple syrup
Zest of 1 lemon
-
Sift all-purpose flour and almond flour into the bowl of a standing mixer or any large bowl. Mix to combine. Add coconut sugar, cinnamon, and salt.
-
Either with a standing mixer or by hand, begin mixing on low speed to combine the ingredients. Keep the mixer on low and slowly add coconut oil and water and continue mixing on low-medium speed until just combined, being careful not to overmix. The dough should be crumbly but come together when you press it.
-
Tip the mix out onto a flat surface and begin forming the dough by pressing it together with your hands. Be careful not to work it too much. Form a flat rectangle and cover it with plastic wrap or aluminum foil. Let it rest in the fridge for 1 hour.
-
MAKE YOUR FILLING: In the oven-safe skillet(s) that you’ll use to bake your tart(s) in, add maple syrup. Heat on high for about 5 minutes. It will start to bubble and reduce. Remove from heat and set aside to cool slightly and let the bubbles disappear.
-
Meanwhile, core and slice your apples thinly using a knife or mandolin, making sure to get them as even as possible. If you don’t have an apple corer, slice your apples and cut out the core with a knife on each slice. Make sure to keep the 2 apples separate.
-
Start adding the apples to the skillet(s) with the maple syrup, starting from the center and moving outwards in a pinwheel motion, layering the slices on top of each other and alternating between Granny Smith slices and Fuji slices. Continue until the whole pan is covered to the edge.
-
Preheat the oven to 350ºF. If making 1 large 10” tart, take the dough out of the fridge and cut the rectangle into an even square. Reserve the leftover dough for something else like cookies. If making 2 8” tarts, cut the rectangle of dough in half. Stretch out the dough to about 1/4” thick using a rolling pin on a floured surface. Find something about the same size or slightly smaller than the circumference of your skillet(s) with the maple syrup and apples and place in on the dough. Use a butter knife to cut around it so that you cut out a perfect circle in your dough. Remove excess dough around it and reserve.
-
Carefully transfer the circle of dough on top of your apples. If it’s smaller than the pan, use your fingers to press it to the edges so that all the apples are covered. Use a pairing knife to make a few slits in the center.
-
Place the tart(s) into the oven and bake for about 15 minutes. Remove from oven and brush all the top crust with the liquid that the apples and maple syrup have started to release. Transfer back to the oven and bake for 25 more minutes, or until golden brown. Every oven is different and it might cook faster in a convention oven—just keep an eye on it.
-
Prepare a baking tray that’s bigger than your skillet(s) lined with aluminum foil. Remove skillet(s) from oven and carefully (the skillet handle(s) will be very hot) place the aluminum and baking tray on top of the tart and quickly flip it so that it comes out of the pan. If some of the apple sticks to the pan, don’t worry—you can always place the pieces of stuck apple back on to the tart. Set aside to.
-
Finish by brushing the top of the tart(s) with maple syrup and the zest of 1 whole lemon. Let cool completely before cutting and serving.
Did you make this recipe? tag us on Instagram @eatogether.co so that we can see it!


be the first to comment